SEAFOOD GUIDES


When Your Order Arrives 

Remove your food products as soon as possible from the box, refrigerate your fresh items and freeze your frozen goods until you are ready to prepare them for consumption.  For optimal freshness and quality, we recommend eating fresh or live seafood within 1 to 2 days after you receive your product.

Our Intention 

While some seafood can be eaten as “sashimi,” we suggest to our customers that they cook seafood fully before consuming or serving.  Consuming raw or undercooked meats, poultry, seafood, shellfish, or eggs may increase your risk of food-borne illness, especially if you have certain medical conditions. Our products are intended to be cooked, unless otherwise labeled for consumption as sushi or sashimi.

We guarantee our quality by observing all food safety handling and practice good manufacturing requirements in the processing, packing, and shipping of your seafood order, please immediately report any concerns you may have about the quality within 24 hours of receipt – never leave our fresh or frozen seafood outside the proper refrigeration. 

In Disclaimer: We are not responsible for any illness or sickness if you consume a product beyond its shelf life, or if you have an allergy to any particular item.

Live Shellfish & Crustaceans

For live seafood like shellfish & crustaceans, store them in your refrigerator immediately after receiving your items. You may clean your live shellfish with fresh water to rinse any sediment or ocean particles off it before you prepare your food for consumption, but don’t submerge any live shellfish or crustacean in fresh water when storing.  

Shellfish Note: All shellfish needs to be kept properly hydrated.  When shellfish are left to the open air, moisture starts to evaporate from the meats and other tissues, always try to cover shellfish with a moist paper towel.  

Important: Do not store any live seafood in a bag and seal it.  Sealing the bag will cut off important oxygen flow that your live items benefit from.  Yes, live seafood also need oxygen to breath just like us! 


How To Properly Defrost Frozen Products

If you have received your seafood in frozen form, retrieve your frozen items from the freezer and store them in the refrigerator at least a day before you want to serve it.  Allow 12-24 hours for your product to properly defrost. Do not rush the defrosting process as it can affect the flavor and texture of your seafood.  

For frozen Stuffed Clams & Clam Pies, follow the directions on the label.

In the event that you received a frozen product that has partially thawed in transit, you can continue to let the product defrost in the refrigerator for immediate use or put it back in the freezer for storage.

We often ship frozen and fresh products together, so Gel Packs are used to keep the shipment as cold as possible during transit. Because gel packs are used instead of dry ice, partial thawing of the frozen products can be expected. The FDA notes that frozen seafood that has not exceeded an internal temperature of 40 Degrees Fahrenheit and remains cool to the touch externally can be refrozen without issue.

For more information about our shipping process regarding frozen products, visit our “Shipping & Delivery” page.

Please contact us if you have any questions about specific products.

DoNotConsume_Icon-01.png

Do Not Consume If

The product has an usual odor.

The product shows no signs of life.

Shellfish items should be disposed of if the shell remains open, does not close, or has a hollow sound.  You can test this by tapping it on a solid surface. Note: Sometimes, the shell will be open slightly, but it does not mean that it is not good. Just tap the shell a few times on a hard surface, if it closes, it is still alive and safe for consumption. 

Live Urchins: When an urchin shows no signs of life, all of the spines will lay flat and not stand up.


ALL LIVE PRODUCTS MUST BE HANDLED WITH CARE

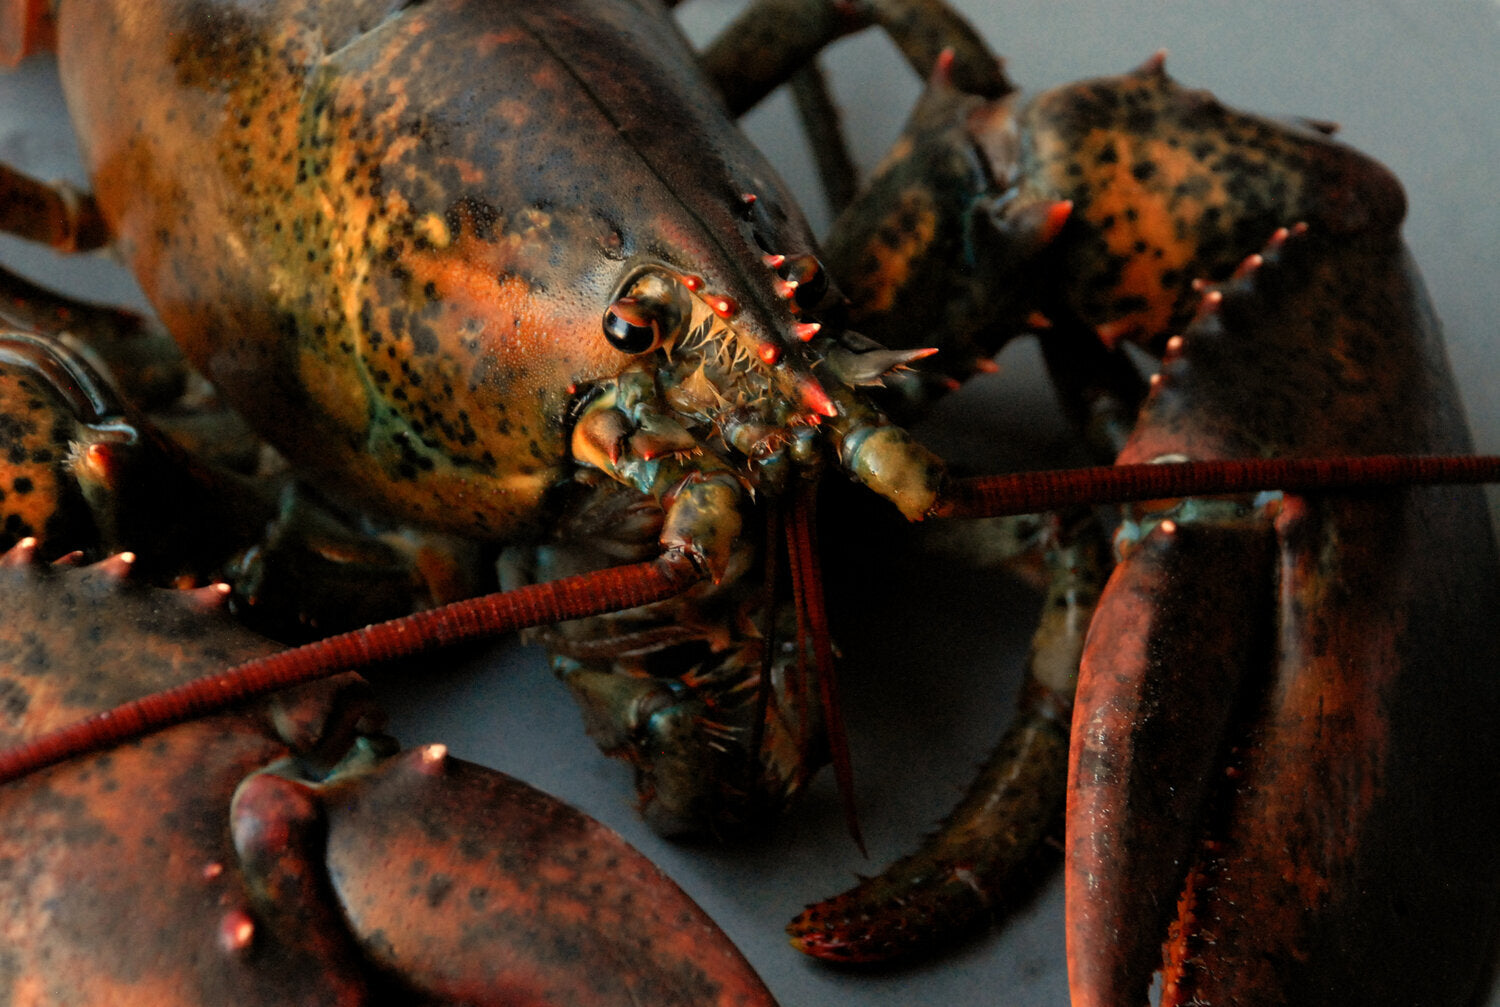
live lobsterS

Remove the lobsters from the package, store in your refrigerator with the saltwater paper on top until you are ready to prepare them.  For optimal freshness, lobsters should be cooked the same day that you receive them, but can last several days if stored properly.  

A lively lobster will straighten its tail and move its claws when picked up (to avoid being pinched, grab the sides of the body firmly from the top.  Be careful not to drop it!)  However, lobsters may get sleepy from the travel time and cold temperatures.  As long as the legs still move, it is alive and safe for consumption.  If you receive a lobster that is not moving when picked up, place it down on a surface to warm up it and see if starts to move.  Although unlikely, if the lobster does not show any signs of life, please email us at websales@intershell.biz with your order number and a photo to help expedite any support you may need.

  • Do Not: Put ice on the lobsters, freshwater is not good for them.

  • Do Not: Put lobsters (or any live seafood) in a bag and seal it.  Sealing the bag will cut off important oxygen flow that your live items benefit from.

  • Do Not: Store them in a warm or unrefrigerated or iced environment.  The ideal storage temperature for live seafood is 38° - 42°F


Steamed Lobster - Preparation

steamed_lobster.png

Ingredients


Lobsters of your size preference

Unsalted butter, melted (for serving)

Preparation

Bring 2" water to a simmer in a large stockpot. Add two 1 1/2-lb. live lobsters (yes, alive) and quickly cover pot—walk away if you need to. Steam lobsters until shells are bright red and meat is cooked through, 8–10 minutes. Remove from pot with tongs and let cool 5 minutes before cracking. Serve with melted unsalted butter.

Cracking open your lobster

The most fun, messy, and best part about enjoying your lobster dinner!  Some people either go straight in with their hands or use a lobster cracker to break the shell and use a fork to retrieve the meat.

The Claws and Knuckles – Use a cracker and a fork to remove the meat from the claws and knuckles.  A lot of juice will be inside, which some people love to drink straight from the claw before cracking it open. 

The Lobster Tail – Squeeze the tail and it should crack down the middle, which will make it easier to use your fork and remove the meat.  Remove the black vein that runs down the middle of the tail. Tip: There is meat in the flippers of the tail as well!

The Legs – Bite down on them and squeeze the meat into your mouth.

The Tomalley (Green substance in the body) – Give it a try, some consider this a delicacy.

The Roe – The ‘Red’ roe turns red after cooking and is delicious – it will appear black if it isn’t cooked enough, so cook it more and it should be all red.


live crabs

Remove the crabs from the package, store in your refrigerator with the saltwater paper on top until you are ready to prepare them. For optimal freshness, crabs should be cooked the same day that you receive them.  

A lively crab will move around its legs and claws when picked up (to avoid being pinched, grab them from the back and hold it in the middle grasping the top and bottom parts, be careful not to drop it!)  However, crabs may get sleepy from the travel time and cold temperatures.  As long as the legs still move, it is alive and safe for consumption.  If you receive a crab that is not moving when picked up, place it down on a surface to warm it up and see if starts to move.  Although unlikely, if the crab does not show any signs of life, please email us at websales@intershell.biz with your order number and a photo to help expedite any support you may need.

  • Do Not: Put ice on the crabs, freshwater is not good for them.

  • Do Not: Put live crabs (or any live seafood) in a bag and seal it.  Sealing the bag will cut off important oxygen flow that your live items benefit from.

  • Do Not: Store them in a warm environment.  The ideal storage temperature for live seafood is 38° - 42°F.

Cracking open your crab

The most fun, messy, and best part about enjoying your crab dinner!  We recommend using cracker to help break the claws and knuckles, while you can use your hands and teeth for the legs. 

  1. The Claws and Knuckles – Use a cracker and a fork to remove the meat from the knuckles and claws.  In the claw there will be a small bone in the middle.  Use your teeth to slide the meat right off the claw. 

  2. The Legs – Break the legs off the body and then separate them piece by piece.  Bite down on end of the leg to remove the shell, you can use your mouth to suck the meat out or use the pointy end of the leg to pick the meat out. 

  3. The Body – When you break apart the body, there is still a lot of meat around the leg area.  Most people just stop at the claws and legs, but if you are up for the challenge, give it a try!


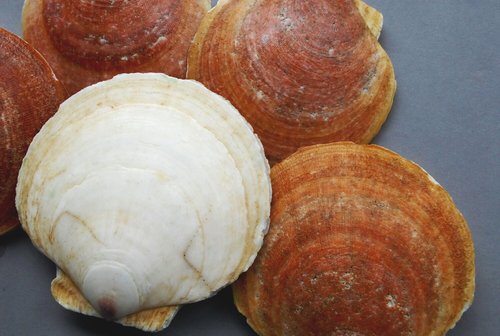
live scallops

Remove the live scallops from the package and place it a bowl in your refrigerator until you are ready to prepare them. Live Scallops should be shucked the same day you receive them.

Shellfish Note

All shellfish needs to be kept properly hydrated.  When shellfish are left to the open air, moisture starts to evaporate from the meats and other tissues, always try to cover shellfish with a moist paper towel.

  • Do Not: Put ice on the live scallops, freshwater is not good for them.

  • Do Not: Put live scallops (or any live seafood) in a bag and seal it.  Sealing the bag will cut off important oxygen flow that your live items benefit from.

  • Do Not: Store them in a warm environment.  The ideal storage temperature for live seafood is 38 degrees Fahrenheit

Unlike other closed shellfish (oysters, hardshell clams, and mussels), live scallops naturally have their shells open when they are alive.  However, scallops may get sleepy from the travel time and cold temperatures.  To see if your scallop is alive, run a small thin tool along the muscle inside the shell to see if the muscle moves. If it does not move right away, it does NOT mean the scallop is dead.

Sometimes during transit, the scallop may lose strength to close its shell fully, but the muscles inside could still have movement - even if it is minimal. If the clam or scallop does not have an odor, the gel packs inside of the box remain solid, and the seafood is 40 degrees F or below, then it is safe for consumption even if no sudden movements are present.

Shucking Live Scallops

If you are looking for Sashimi Grade Scallops, buying Live North Atlantic Scallops is the only way to go.  Although shucking and cleaning the scallops might take a few extra steps, tasting the tender and sweetness in the scallop out of the shell will melt in your mouth.  

To shuck your live scallops, the recommended tool to use is a scallop knife.

  1. Rinse the scallop to clean it from any particles on the outside of the shell.

  2. Place the scallop flat in your hand.  Take your shucking tool and run it along the top of the shell to sever the meat from the shell.  The top shell should open with ease.

  3. Run the shucking tool along the bottom of the shell to sever the meat from the shell completely.  Peel off the roe and the belly of the scallop and separate the meat.  Discard the belly and roe.

  4. Rinse off the meat with water to remove any remaining sediment.

  5. You can eat the scallop as is or cook them and enjoy!


surf clams 

Surf+Clam+Note.png

Unlike other closed shellfish (hardshell clams, mussels, & oysters), live surf clams naturally stay open when it is alive, and the shells do not fully close.

Remove the surf clams from the package, store in your refrigerator until you are ready to prepare them.  For optimal freshness, surf clams should be shucked and prepared the same day you receive them.

Shellfish Note

All shellfish needs to be kept properly hydrated.  When shellfish are left to the open air, moisture starts to evaporate from the meats and other tissues, always try to cover shellfish with a moist paper towel.

  • Do Not: Put ice on the surf clams, freshwater is not good for them.

  • Do Not: Put surf clams (or any live seafood) in a bag and seal it.  Sealing the bag will cut off important oxygen flow that your live items benefit from.

  • Do Not: Store them in a warm or unrefrigerated or iced environment.  The ideal storage temperature for live seafood is 38° - 42°F.

Shucking Live Surf Clams

To shuck your live surf clams, the recommended tool to use is a clam knife. 

  1. Rinse the entire surf clam to clean it from any sediments on the outside of the shell.

  2. Place the surf clam in your hand.  Take your shucking tool and run it along the top of the shell to sever the adductor (the part that attaches the meat to the shell). The top shell should open with ease.

  3. Run the shucking tool along the bottom of the shell to sever the adductor from the shell.

  4. Remove the meat from the shell and clean carefully by repeatedly flushing to remove all sediments with water.    


Surf Clams - Chinese Preparation

surf_clams.png

Guey Fe Bong is a dish you can find in most Chinese Restaurants that is loved by all ethnicity’s.  Preparing Guey Fe Bong is simple and only requires a few, simple ingredients.

Ingredients

1 Live Surf Clam

Soy sauce – ¼ cup

Minced Garlic – 2 tablespoons

Cooking Oil (Sesame or Olive Oil) – 3 tablespoons

Scallions - 1 stock

Optional: Thin white rice noodles – ¼ cup

Preparation

  1. Bring a pot of water to a rolling boil.

  2. While the water is warming up, shuck your live surf clam to remove the meat. See above for instructions on how to shuck your live surf clam and clean it.  Rinse the shells and set them aside for later.

  3. Use a sharp knife to slice the foot, mantle and siphon, and adductor.

  4. Quickly blanch the clam parts in the boiling water for 12-15 seconds - be careful not to overcook the clam. 

  5. Use a slotted spoon to remove the clam parts out of the water and place on the clam shells.

  6. In a separate sauté pan, cook the soy sauce and minced garlic in cooking oil.  If you are using rice noodles, add to the sauce pan and saturate.  Wait for it to garlic to brown and the soy sauce to start bubbling, this should only take a few minutes. 

  7. Pour the sauce onto the clams in the shell.  Garnish with slice scallion.

  8. Serve and enjoy!


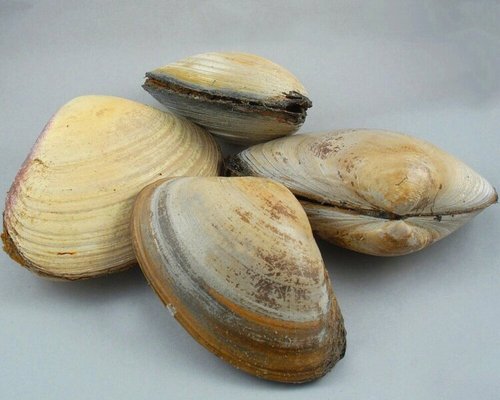
hardshell clams 

Remove the clams from the package and place it a bowl in your refrigerator until you are ready to shuck or cook them. 

Shellfish Note

All shellfish needs to be kept properly hydrated.  When shellfish are left to the open air, moisture starts to evaporate from the meats and other tissues, always try to cover shellfish with a moist paper towel.

  • Do Not: Put ice on the clams, freshwater is not good for them.

  • Do Not: Put clams (or any live seafood) in a bag and seal it.  Sealing the bag will cut off important oxygen flow that your live items benefit from.

  • Do Not: Store them in a warm or unrefrigerated or iced environment.  The ideal storage temperature for live seafood is 38° - 42°F

Hardshell clams are one of the few shellfish items that are the easiest to store and have a longer shelf life than others. Is the clam is open or sounds hollow when tapped on a solid surface and doesn’t close, discard the clam.

Shucking Hardshell Clams

To shuck your live surf clams, the recommended tool to use is a quahog knife.  Click this link here to purchase.

  1. Rinse the clam thoroughly to clean it from any particles on the outside of the shell.

  2. Use another cloth to secure the clam in your hand. 

  3. Insert the clam knife between the clam shells and press into the muscle.  Keep wiggling the clam knife until the clam opens.

  4. Cut the muscle on the top and bottom of the shell.  Remove the top shell and discard.

  5. Serve with your choice of cocktail sauce, horse radish, or a wedge of lemon and enjoy!

hardshell_clams-01.png

Serving Suggestions

When eating hardshell clams, it all comes down to personal preference.  You can use any size hardshell clam for whatever dish you prepare – they are all the same species, large or small.

Pasta & Soups – Countnecks or Littlenecks.

Raw on the ½ Shell – Countnecks, Littlenecks, or Topnecks are the sizes people prefer. 

Stuffed Clams – Cherrystones or Quahogs are the best size for stuffing.  However, the smaller sizes may be suitable for ‘Clams Casino’ – a classic version of a stuffed clam.


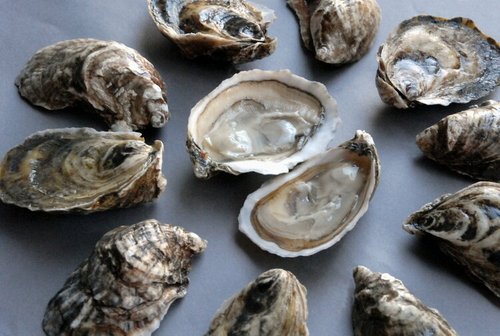
oysters

Remove the oysters from the package in your refrigerator until you are ready to shuck them. 

  • Do Not: Put ice on the oysters, freshwater is not good for them.

  • Do Not: Put oysters (or any live seafood) in a bag and seal it.  Sealing the bag will cut off important oxygen flow that your live items benefit from.

  • Do Not: Store them in a warm environment.  The ideal storage temperature for live seafood is 38 degrees Fahrenheit.

Oysters are one of the few shellfish items that are the easiest to store and have a longer shelf life than most other shellfish. If the oyster is open or sound hollow when tapped on a solid surface, discard the oyster.

Shucking an Oyster

To shuck oysters, the only tool you should use is a real oyster knife.  Note: We strongly advise against using any other shucking tools because an oyster is a little more difficult to open than clams or scallops.  An oyster knife is short and sturdy with a sharp curved tip, specifically designed strong enough to open oysters with ease to lower the risk of hurting yourself. 

  1. Rinse the oyster thoroughly to clean any sediments on the outside of the shell.

  2. Grab a dish rag and place it on a sturdy surface. Place the oyster on the dish rag. 

  3. Use another cloth around your hand to protect it.  Press down on the oyster and firmly grip the oyster knife to insert it in the opening of the shell.  

  4. Use and up and downward like motion to wiggle the opening of the shell.  When you feel it pop open, remove your oyster knife and wipe it on the cloth to wipe the sediment off the knife.

  5. Keeping the oyster knife upward, run it along the top of the shell to sever the muscle from the shell.  Do the same to the bottom of the shell.  Remove the top shell and clean off your oyster knife.

  6. Look inside the oyster and with a clean knife, sweep away any sediment that may have gotten into the oyster meat. 

  7. Optional: Rinse the meat with a little bit of water. Although, the juice of the oyster is the best part. 

  8. Serve with your choice of cocktail sauce, horse radish, or a wedge of lemon and enjoy!


steamers 

Remove the steamers from the package store in your refrigerator until you are ready to prepare them.  Steamers should be cooked the same day you receive them, but can last several days if stored properly. 

  • Do Not: Put ice on the steamers, freshwater is not good for them.

  • Do Not: Put steamers (or any live seafood) in a bag and seal it.  Sealing the bag will cut off important oxygen flow that your live items benefit from.

  • Do Not: Store them in a warm or unrefrigerated or iced environment.  The ideal storage temperature for live seafood is 38° - 42°F

Unlike oysters, hardshell clams, and mussels, steamers naturally have a long foot known as the siphon that reveals itself from the shell.  Steamers are also referred to as ‘Soft Shell Clams’ because the shell is significantly softer than other hardshell clams.  When packing steamers, we handle them with extra care because of how delicate they are.  During the handling and travel process, it is possible that a couple of the steamers out of the bunch may break.  This is a normal thing to expect with this species.  Although unlikely, if there are a significant amount broken in your order that reflects on the way the order is packed, please email us at websales@intershell.biz with your order number and a photo to help expedite any support you may need.


STEAMERS - PREPARATION

Preparation

The preparation for cooking steamers is key.  Because they live in the sand, steamers sometimes have excess sand sitting inside the shell within the meat. We strongly recommend boiling steamers as the most reliable cooking method to remove any excess sand inside the clam. Rinsing the steamers with water is not enough to get the sand out, but there is a special technique that can be used to remove at least most of it. 

  1. Rinse the outside steamers with running water thoroughly.  Put the steamers in a bowl and fill it with water. 

  2. Let the steamers sit in the water for 5 minutes, drain, and repeat at least 3 -5 times (no more than that) until you see there’s a little amount of sand at the bottom of the bowl - It is normal to see the siphon extend out of the shell.  Note: This is the only shellfish that is an exception to soak in fresh water. Letting the steamers soak in fresh water for a short amount of time will not kill them, this method helps the steamer ‘spit out’ the sand.  You only want to do this if you are preparing then to eat, do not let them soak for hours at a time.

Cooking Instructions

Cooking Time: 7-10 minutes or until shells open.

  1. Find a large pot to boil your steamers in.  Fill it with enough water to where the steamers will be completely submerged.

  2. Optional: Add a flavor booster of your choice in the boiling water such as garlic, onion, spices, don’t be afraid to get creative. An old time favorite is to add a can of beer into the water - Believe it or not, it is absolutely delicious!

  3. Put the steamers in the boiling water. The steamers are fully cooked when the shells open.  Be careful not to overcook the steamers as they will become chewy.

  4. Use a slotted spoon to carefully remove the steamers out of the water and into a bowl.  Do not leave the steamers in the water when it is finished cooking.

  5. Save the broth! Don’t discard it. Take a ladle and pour a little bit of the broth into a separate bowl or cup for dipping the whole clams into. 

  6. Let the steamers cool down for a minute. If you are first time steamer eater, read below for step-by-step instructions.

Eating Instructions

  1. Open the shell and remove the cooked clam. 

  2. Use your fingers to pull off the skin covering the siphon.  Discard the extra skin and shell into a separate bowl.

  3. Grab the siphon with your fingers and swirl it around in the broth bowl.  This helps rinse off any remaining sediments of sand within the steamer.

  4. Optional: Dip in melted butter after rinsing.  Enjoy!


LIVE SEA URCHINs

Available December - March

Storing your live urchins

Remove the live urchins from the package to store in your refrigerator until you are ready to prepare them. 

  • Do Not: Put ice on the live urchins, freshwater is not good for them.

  • Do Not: Put live urchins (or any live seafood) in a bag and seal it.  Sealing the bag will cut off important oxygen flow that your live items benefit from.

  • Do Not: Store them in a warm or unrefrigerated or iced environment.  The ideal storage temperature for live seafood is 38° - 42°F

The shelf life for sea urchins stored in a refrigerated environment is 4-6 days. When the spines of the urchin are laying flat and not standing, it is a sign the urchin is not good for consumption.

How to Open Live Urchins

  1. Place the live urchin flat side down on a sturdy surface near a sink.

  2. Use a large sharp knife to carefully cut right down the middle of the urchin.

  3. Once the urchin is split in half, retrieve the orange roe (uni) carefully and place into a cup of water. Discard the shell.

  4. Gently clean the roe within the cup of water to remove any purple/black sediment. Even though the roe seems like it could fall apart easily, it shouldn’t. The texture of the roe should be soft and delicate but be firm enough to hold together.

  5. Serve the roe as is or however you would like and enjoy! Fresh uni should have a creamy yet sweet taste to it.


RAZOR CLAMS

Storing your razor clams

Remove the razor clams from the package to store in your refrigerator until you are ready to prepare them.  Razor clams should be cooked the same day you receive them, but can last several days if stored properly. 

  • Do Not: Put ice on the razor clams, freshwater is not good for them.

  • Do Not: Put live razor clams (or any live seafood) in a bag and seal it.  Sealing the bag will cut off important oxygen flow that your live items benefit from.

  • Do Not: Store them in a warm or unrefrigerated or iced environment.  The ideal storage temperature for live seafood is 38° - 42°F

Unlike oysters, hardshell clams, and mussels, razor clams naturally have a long foot known as the spade protruding from the shell and the shell does not close entirely.  Similar to steamer clams, razor clams also are harvested from the same areas and have very delicate shells that must be handled with care.

How to prepare live razor clams

Cleaning live razor clams can be simply done by rinsing any sediment off the shells of the clams. After they are clean, you can cook it or prepare it for sushi.

Razor clams have been in higher demand over the past few years in kitchens of high end restaurants across the country. Although they can be used in just about any recipe calling for clam meat, and have been traditional in chowders, steamed, sautéed and fried here in New England, many chefs are exploring new ways to prepare them: over pastas, as ceviche, in Asian dishes, and even in salads. They can be cooked in the same way as mussels and are ready to eat as soon as their shells reopen. The flavor profile is mild, sweet, but slightly salty with a firm, tender texture. They cook and open within a short amount of time – be careful not to overcook them!


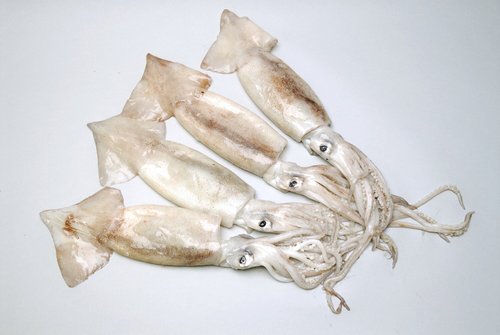
Fresh LOLIGO SQUID

Available May & June

Storing your fresh squid

We recommend eating fresh squid as soon as you receive it.  If you wish, you can freeze your squid to prepare for a later date after it has been cleaned.  Freezing squid is very easy to do and will freeze & defrost very well. You can store fresh squid for up to 3 days in a refrigerated environment. When the skin of the squid starts to turn pink or red, then the squid is not good for consumption.

How to Clean Squid

 When you receive your fresh squid, you will need to clean it & prepare.

  1. Grab the body and the head of the squid.  Gently pull the head and tentacles from the body, the insides and ink sac should come out.

  2. Slice the head below the eyes to separate the head and tentacles.  Save the tentacles & discard the head and the insides of the body.

  3. If you plan to eat the tentacles, you must remove the beak.  The beak is a small cartilage located at the base of the tentacles that connects the head of the squid. 

  4. Within the squid body, remove the long small thin piece of cartilage.  You can grab it with your fingers and pull it out with ease.

  5. Optional: Grasp the thin spotty skin on the body of the squid and peel back toward the tip and discard.  The skin is edible, but most chefs remove it for a more appealing presentation.

  6. Thoroughly wash the body and tentacles one more time before cooking.  Pat the squid dry afterwards.

  7. You can slice the body to make rings for fried calamari or use the whole body for stuffing.  Squid cooks very quickly, be careful not to overcook it!


LIVE HOKKIGAI

Storing your stimpson clams 

Remove the stimpson clams from the package, store in your refrigerator until you are ready to prepare them.  For optimal freshness, stimpson clams should be shucked and prepared the same day you receive them.

Shellfish Note

All shellfish needs to be kept properly hydrated.  When shellfish are left to the open air, moisture starts to evaporate from the meats and other tissues, always try to cover shellfish with a moist paper towel.

  • Do Not: Put ice on the stimpson clams, freshwater is not good for them.

  • Do Not: Put stimpson clams (or any live seafood) in a bag and seal it.  Sealing the bag will cut off important oxygen flow that your live items benefit from.

  • Do Not: Store them in a warm or unrefrigerated or iced environment.  The ideal storage temperature for live seafood is 38° - 42°F.

Shucking Live Stimpson Clams (Hokkigai)

To shuck your live clams, the recommended tool to use is a clam knife.  Click this link here to purchase.

  1. Rinse the entire clam to clean it from any sediments on the outside of the shell.

  2. Place the clam in your hand.  Take your shucking tool and run it along the top of the shell to sever the adductor (the part that attaches the meat to the shell).  The top shell should open with ease.

  3. Run the shucking tool along the bottom of the shell to sever the adductor from the shell.

  4. Remove the meat from the shell and clean carefully by repeatedly flushing to remove all sediments with water.    

Cleaning Stimpson Clam Meat

  1. Separate the foot, the mantle and syphon, and the adductors from one another.

  2. Squeeze the belly out of the foot and discard.  The belly of the stimpson clam is not tasty for consumption.

  3. Rinse off the foot, mantle and syphon, and adductors with water to remove any excess sediments on the clam. 

    • When it is raw, the foot is a deep purple color. When it is cooked, it becomes a red color.

    • If you do decide to cook it, blanch it for very little time (26 seconds). When the clam is cooked or pickled for too long, the foot can become tough to chew.

    • All parts of the clam are ideal for making sushi, ceviche is outstanding and the syphon and mantle make great “Himo” salad.


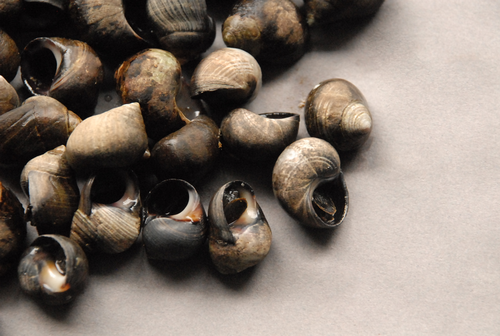
LIVE PERIWINKLES

Storing your periwinkles 

Remove the periwinkles from the package and place it a bowl in your refrigerator until you are ready to prepare them. Periwinkles should be consumed the same day you receive them.

  • Do Not: Put ice on the periwinkles, freshwater is not good for them.

  • Do Not: Put periwinkles (or any live seafood) in a bag and seal it.  Sealing the bag will cut off important oxygen flow that your live items benefit from.

  • Do Not: Store them in a warm or unrefrigerated or iced environment.  The ideal storage temperature for live seafood is 38° - 42°F.

Cooking Instructions

  1. Rinse the periwinkles thoroughly to clean any sediments on the outside of the shell.

  2. Bring a pot of salted water to a rolling boil.

  3. Cook the periwinkles for approximately 7 minutes.

  4. Drain the water, and remove the meat from the shell with a toothpick by pulling the meat out gently.  If the meat doesn’t slide out right away, it needs a little more time to cook.

  5. Eat as is or toss in a sauce of your choice and enjoy! – Black Bean sauce is a common Asian preparation that a lot of people love.


Northern Moon Snail

Storing your northern moon snails: 

Remove the moon snails from the package and place it a bowl in your refrigerator until you are ready to prepare them. Northern Moon Snails should be consumed the same day you receive them.

  • Do Not: Put ice on the moon snails, freshwater is not good for them.

  • Do Not: Put moon snails (or any live seafood) in a bag and seal it.  Sealing the bag will cut off important oxygen flow that your live items benefit from.

  • Do Not: Store them in a warm or unrefrigerated or iced environment.  The ideal storage temperature for live seafood is 38° - 42°F


Cooking Instructions

  1. Rinse the moon snails thoroughly to clean any sediments on the outside of the shell.

  2. Bring a pot of salted water to a rolling boil.

  3. Cook the periwinkles for approximately 40 minutes.

  4. Drain the water, and remove the meat from the shell with a fork by pulling the meat out gently. 

  5. Cool down the moon snail meat

  6. Slice the moon snail meat very thin and serve in a sauce of your choice, similar to any conch or whelk salad. 

  7. Tip: For some inspiration, you can prepare the moon snail meat as a dish called “Golbaengi-muchim”, (Golbaengi means “whelk” and a Muchim is a salad) - a popular South Korean dish.